
Anúncios
Every construction project in the United States needs a clear plan and the right materials. Whether it’s a backyard deck or a small bookshelf, picking the right wood is key. Many beginners get confused by the difference between labeled numbers and actual measurements.
Choosing the wrong boards can cause structural mistakes and waste money. Professional builders use standard dimensions to make sure every piece fits perfectly. This ensures your building frame stays square and your joints stable.
Anúncios
This guide makes the complex world of timber measurements easier for you. We’ll explore why a two-by-four isn’t actually two inches by four inches. Understanding these lumber sizes explained makes your woodworking tasks smoother and more professional.
Knowing these details helps you talk clearly with suppliers and avoid expensive mistakes on the job site. This knowledge is the base for any successful renovation or carpentry project. You must know exactly what you’re buying before you start cutting.
- Identify the significant difference between nominal and actual wood dimensions to ensure project accuracy.
- Recognize how standard industry measurements prevent structural errors and reduce material waste in construction.
What You Need to Know About Nominal vs. Actual Lumber Sizes
Lumber sizes are often labeled with nominal measurements. These can be quite different from the actual sizes. This is because wood is planed and smoothed to a standard size during processing.
Anúncios
The nominal size is what you see in the lumber yard. The actual size is what the lumber measures after processing.
The Difference Between Nominal and Actual Sizes
The gap between nominal and actual sizes comes from shrinkage and the planing process.
- Nominal Size: The labeled size of the lumber, used for identification purposes.
- Actual Size: The true dimensions of the lumber after processing.
For instance, a 2×4 lumber doesn’t really measure 2 inches by 4 inches. It’s usually 1.5 inches by 3.5 inches after planing.
Knowing this difference is key for planning and doing construction or woodworking projects right. It impacts how much lumber you need and the structure’s integrity.
Here are some examples of nominal vs. actual lumber sizes:
| Nominal Size | Actual Size |
|---|---|
| 1×4 | 0.75 x 3.5 |
| 2×4 | 1.5 x 3.5 |
| 2×6 | 1.5 x 5.5 |
Understanding the difference helps you plan better, avoid mistakes, and build sturdy structures.
Lumber Sizes Explained: A Complete Breakdown
Knowing the different lumber sizes is key for a successful project. Lumber sizes vary, each fitting specific uses and projects.
Common lumber sizes are based on their nominal size, before they are processed. For example, a 2×4 is really 1.5 inches by 3.5 inches after it’s been planed. It’s important to understand these sizes for accurate woodworking.
Popular sizes like 2x4s, 2x6s, and 2x8s are great for framing and support. For decking and fencing, 1x6s and 1x8s are common. Larger sizes, such as 4x4s and 6x6s, are used for heavy-duty construction.
Lumber sizes have many uses. Smaller sizes, like 1x2s and 1x3s, are perfect for trim and molding. Larger sizes are for structural parts. Choosing the right size ensures your project is stable, durable, and looks good.
When picking lumber, consider the type (softwood or hardwood) and moisture content. These factors impact the lumber’s final size and performance.
Standard Dimensional Lumber Sizes and Their Actual Measurements
Standard dimensional lumber sizes are key in framing and construction. But, their actual measurements can vary. This difference often causes confusion for builders and DIY fans. It’s important to know these sizes and their real measurements to complete projects right and fast.
Lumber is sold by its nominal dimensions, not the real ones. For instance, a 2×4 lumber is not 2 inches by 4 inches. It’s actually 1.5 inches by 3.5 inches. This is because the lumber is planed down to make the surfaces smooth.
To deal with these differences, builders use a lumber dimensions chart. This chart is a quick guide to the real sizes of various lumber types.
Here are some common standard lumber sizes and their real measurements:
- Nominal 1×4, Actual: 0.75 x 3.5 inches
- Nominal 2×4, Actual: 1.5 x 3.5 inches
- Nominal 2×6, Actual: 1.5 x 5.5 inches
- Nominal 2×8, Actual: 1.5 x 7.25 inches
- Nominal 2×10, Actual: 1.5 x 9.25 inches
Using a lumber dimensions chart helps builders and DIYers pick the right lumber sizes. This avoids expensive mistakes and ensures the structure is strong.
Board Lumber Dimensions and When to Use Them
Board lumber comes in different sizes, each for a specific use. Knowing these sizes helps pick the right material for your project.
Board lumber is sorted by thickness, width, and length. The most common types are:
- 1x lumber (3/4 inch thick)
- 2x lumber (1 1/2 inches thick)
These types serve different needs. For instance, 1x lumber is great for shelving and paneling. On the other hand, 2x lumber is best for framing and structural parts.
| Type | Thickness | Width | Common Use |
|---|---|---|---|
| 1x Lumber | 3/4 inch | Varies | Shelving, Paneling |
| 2x Lumber | 1 1/2 inches | Varies | Framing, Structural Elements |
When picking board lumber, think about your project’s needs. Consider the load it must bear and the look you want.
How Moisture Content Affects Lumber Dimensions
Moisture content is key in figuring out lumber sizes for building and woodworking. Lumber, being natural, changes with its surroundings, like moisture levels. It can shrink or swell, changing its size.
The moisture in lumber is shown as a percentage of its dry weight. New lumber usually has more than 30% moisture. As it dries, either naturally or in a kiln, the moisture goes down. It keeps adjusting until it matches its environment.
Moisture content greatly affects lumber’s stability. Too wet or too dry lumber can cause issues. For example, too moist lumber might shrink, causing gaps. Too dry lumber might expand, leading to warping.
Choosing the right lumber is crucial. Knowing the project’s environment helps pick the right moisture level. This ensures the project stays stable and lasts longer.
Also, different lumber types react differently to moisture. Some are more stable than others. Certain treatments can also help keep dimensions stable.
Specialty and Non-Standard Lumber Dimensions
There’s a world beyond standard lumber sizes. It’s filled with specialty and non-standard lumber for specific needs. These sizes are key for custom fits, unique looks, or special structural needs.
Specialty lumber comes in many sizes and shapes. It’s made for certain uses or industries. For example:
- Exotic hardwoods in unique dimensions for high-end furniture making
- Custom milled lumber for historical restoration projects
- Oversized timbers for large-scale construction or decorative elements
You can find these non-standard sizes at specialty lumber yards or custom milling services. It’s important to know your project’s needs well. This includes the right dimensions, material properties, and building codes.
To work well with specialty lumber, keep these tips in mind:
- Plan carefully to minimize waste and optimize the use of custom sizes.
- Verify the actual dimensions of the lumber, as they can vary from nominal sizes.
- Be prepared for potentially higher costs due to the custom nature of the lumber.
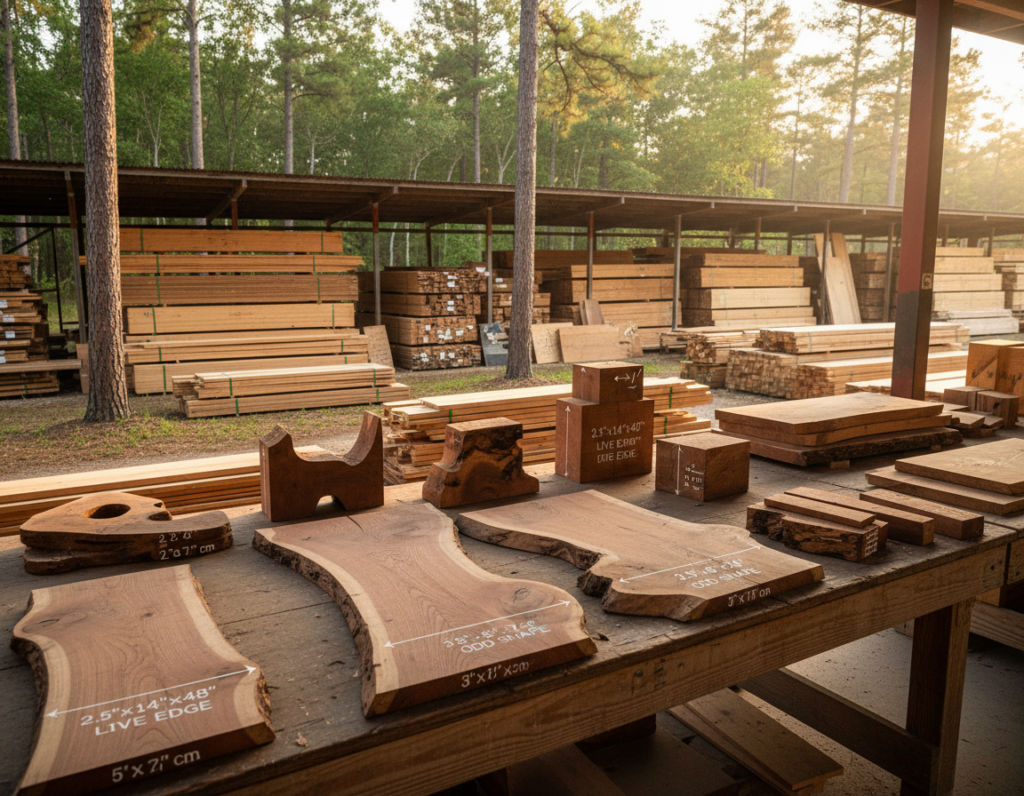
Specialty and non-standard lumber open up creative and functional options for projects. Knowing where to find these materials and how to use them lets builders and craftsmen achieve unique results. Results that standard lumber can’t match.
Hardwood Lumber Sizing: A Different System
The world of hardwood lumber sizing has its own rules, different from softwoods.
Hardwood lumber is graded and sized by the National Hardwood Lumber Association (NHLA) rules. These rules focus on quality and appearance, not just size.
Hardwood lumber is sold in a rough-sawn state. Its thickness is measured in quarters of an inch. For example, 4/4 means one inch thick.
Understanding Hardwood Lumber Grading
Hardwood lumber grading is about the clear, usable lumber in a board.
The NHLA grading rules look at knots, checks, and other defects. They decide the grade based on these factors.
| Grade | Description | Typical Use |
|---|---|---|
| FAS (Firsts and Seconds) | High-quality lumber with minimal defects, yielding a high percentage of clear lumber. | Furniture making, flooring, and other high-end woodworking projects. |
| Select | Lumber with a good appearance, allowing for some defects. It’s a step below FAS in quality. | Paneling, molding, and other applications where appearance is important. |
| Common | Lumber with more defects and less clear surface area. It’s further divided into sub-grades like #1 Common and #2 Common. | Construction, shelving, and projects where cost is a factor and appearance is less critical. |
Knowing the unique sizing and grading system for hardwood lumber is key. It helps choose the right material for woodworking projects.
By learning about NHLA grading rules and hardwood lumber grades, you can make better choices. This leads to better results in your projects.
Step-by-Step Guide to Calculating Lumber Needs for Your Project
Getting the right amount of lumber is key to a successful project. It’s important to know how to calculate lumber needs accurately. This ensures your project is well-planned and executed efficiently.
Understanding Your Project Requirements
First, you need to know what your project needs. This includes the type of project, design specifications, and materials needed.
Start by gathering all project plans and specifications. Identify the components of your project and the lumber needed for each. This could include framing, decking, or finishing lumber for trim and molding.
Step 1: Measure Your Project Components
Measure each component of your project accurately. Take detailed measurements of length, width, and thickness. For framing, calculate the total linear feet needed for walls, floors, and roof.
For example, when building a deck, measure its length and width. Remember to include the spacing between boards.
Step 2: Use a Lumber Dimensions Chart
A lumber dimensions chart is crucial. It shows the actual dimensions of lumber, not just the nominal ones.
Using a chart, you can figure out how much lumber to buy. For instance, knowing the actual dimensions of 2x4s helps in calculating the total needed.
Step 3: Calculate the Total Lumber Required
With measurements and actual lumber dimensions, calculate the total needed. Convert your project’s needs into total board feet or linear feet of lumber.
For complex designs or multiple lumber types, break down the calculation. This avoids errors and ensures enough lumber for each part.
Tips for Accurate Lumber Calculation
- Account for Cuts and Waste: Add a percentage for cuts and waste. A 10% to 15% addition is common.
- Consider the Type of Lumber: Different lumber types affect calculations. Hardwood is sold by board foot, while softwood by linear foot.
- Use Online Calculators: Online tools can simplify lumber calculation.
By following these steps and tips, you can ensure accurate lumber calculations. This helps stay on budget and avoids project delays.
How to Select the Correct Lumber Size for Specific Applications
Choosing the right lumber for your project starts with knowing the standard sizes.
When picking lumber, think about your project, how much weight it will hold, and the look you want.
- Consider the project’s purpose and the weight it will need to support.
- Think about the type of wood and its density.
- Check the lumber’s moisture content and how it may affect the size.
Different projects need different lumber sizes. For example, decking needs wood that resists rot and insects. Framing requires strong, sturdy lumber.
A wood sizes guide is very helpful. It lists standard lumber sizes and their actual sizes.
Here are some tips for picking lumber size:
- For framing, use 2×4 or 2×6 lumber, depending on the load-bearing needs.
- For decking, choose 5/4 or 2×6 lumber based on spacing and load.
- For fencing, pick 2×4 or 4×4 lumber based on height and design.
By considering these points and using a wood sizes guide, you can pick the right lumber for your project.
Using Lumber Dimension Charts and Conversion Tables
Lumber dimension charts and conversion tables are key for planning projects well. They help you understand the real size of lumber. This size can be different from what it’s called.
To use these charts, first find the nominal size of the lumber. Then, look at the chart to see the actual size. For example, a 2×4 is really 1.5 inches by 3.5 inches.
Conversion tables are great for different lumber sizes or when switching between metric and imperial. They make sure your calculations are right.
Here are some tips for using lumber dimension charts and conversion tables:
- Always check the real size of lumber before starting your project.
- Use conversion tables to switch between measurement systems.
- Double-check your math to avoid mistakes.
Learning to use lumber dimension charts and conversion tables well makes your woodworking projects more precise and efficient.
Avoiding Common Mistakes When Working with Lumber Sizes
Getting lumber sizing right is key to any woodworking or construction project’s success. Knowing and using lumber dimensions correctly can cut down on mistakes and waste. This ensures projects are finished on time and within budget.
Many people mix up nominal lumber sizes with actual sizes. Nominal sizes are what lumber is before it’s planed and dried. Actual sizes are what it is after these processes. For instance, a 2×4 is really 1.5 inches by 3.5 inches.
To avoid this mistake, it’s crucial to check lumber dimension charts. You need to know the difference between nominal and actual sizes. Below is a table showing some common lumber sizes and their actual measurements:
| Nominal Size | Actual Size |
|---|---|
| 1×4 | 0.75 x 3.5 |
| 2×4 | 1.5 x 3.5 |
| 2×6 | 1.5 x 5.5 |
Accurate measuring and cutting of lumber is also vital. Wrong cutting methods or not considering the saw blade’s width (kerf) can cause errors. Always double-check your measurements and remember the kerf when cutting.
Here are some tips for precise measurement and cutting:
- Use a high-quality tape measure and make sure it’s calibrated right.
- Mark the lumber clearly and precisely before cutting.
- Remember the saw blade’s kerf when making cuts.
- Cut slowly and carefully to avoid mistakes.
By knowing common lumber dimensions and following best practices, you can avoid many mistakes. This knowledge, along with using lumber dimension charts and conversion tables, will make your projects successful and stress-free.
Conclusion
Knowing about lumber sizes is key for any building or woodworking project. Using the right sizes means less waste and more time saved. We’ve looked at the differences between nominal and actual sizes, how moisture affects them, and picking the right size for each job.
By learning about lumber sizes, you can make better choices when buying and using lumber. This knowledge helps avoid mistakes that can cause delays and extra costs. Using charts and tables makes it easier to figure out what lumber you need.
With a good grasp of lumber sizes, you can plan and do your projects better. It doesn’t matter if you’re experienced or just starting out. Knowing about lumber sizes is crucial for getting your projects done right.