

Anúncios
Woodworkers know the frustration of finding a twisted board. Keeping materials in top shape needs a careful plan. Without organization, you’ll waste money and time on failed projects.
High moisture can cause warping, rot, or pests. These problems can ruin your expensive wood and slow you down. Learning to store lumber right keeps it flat and dry for your projects.
– Prevent common damage like warping, rot, and pests through better organization.
– Maintain the quality and flatness of your wood for long-term project success.
– Create a more efficient workshop environment by managing your inventory correctly.
Anúncios
Learning specific storage tips can change your workflow. By controlling the climate and stacking items right, you protect your materials. This guide will show you how to keep your shop running smoothly.
Success begins with good preparation and wood management. You need a system that stops bowing and uses floor space well. Let’s explore the best ways to organize your boards now.
Understanding Lumber Storage Fundamentals
Knowing how to store lumber is key for woodworking fans. The right storage keeps the lumber quality and integrity up.
Anúncios
Moisture content is very important. Wood that’s too wet or too dry can warp, crack, or rot. It’s best to store lumber in a place with humidity between 30% to 50%. This stops it from shrinking or expanding too much.
Temperature matters too. Extreme heat or cold can damage the wood. Keeping the temperature between 60°F to 70°F (15°C to 21°C) is best for lumber storage.
Airflow is also crucial. It helps prevent moisture buildup and stops mold and mildew. Make sure to store lumber in a place with good air circulation.
By managing these factors, you can make sure your lumber stays in great shape. This is important for your woodworking projects.
Assessing Your Workshop Space for Lumber Storage
Checking your workshop space is key to keeping your lumber safe. You must first know what your workshop’s conditions are like.
To store lumber right, look for spots that could harm it. Moisture and temperature changes are big concerns.
Moisture-Prone Zones
Moisture harms lumber, causing it to warp, rot, and grow mold. Places near windows, doors, or outside are more moist.
Look for dampness or water leaks in your workshop. Check for condensation and make sure it’s well-ventilated.
Temperature Fluctuation Areas
Changes in temperature can also damage lumber. Near heating vents or drafty spots, lumber can dry out too fast.
Find these spots and figure out how to keep the temperature steady. Use insulation or keep lumber away from heat.
| Area to Inspect | Potential Issue | Mitigation Strategy |
|---|---|---|
| Near Windows/Doors | Moisture Intrusion | Seal gaps, improve ventilation |
| Heating Vents/Radiators | Temperature Fluctuations | Insulate, relocate lumber |
| Exterior Walls | Cold Spots, Moisture | Insulate walls, use lumber covers |
Understanding and fixing these issues helps keep your lumber safe. This way, it stays in good shape for your projects.
Creating Optimal Lumber Storage Conditions
The key to keeping lumber quality up is to store it right. This means controlling the environment to avoid damage and decay.
Moisture control is a big deal in lumber storage. Too much moisture can cause warping, rot, and pest problems. So, keeping humidity stable is crucial.
Using Dehumidifiers Effectively
Dehumidifiers are key in managing moisture in your workshop. They remove extra moisture from the air, stopping lumber from warping and decaying.
To get the most out of dehumidifiers, follow these tips:
- Choose a dehumidifier that fits your workshop size.
- Put the dehumidifier in the middle to ensure air circulates well.
- Keep an eye on and maintain the dehumidifier to make sure it works well.
Monitoring Moisture Content with Meters
It’s important to check the moisture in your lumber to keep it in top shape. Moisture meters help you get accurate readings.
There are various moisture meters out there, like pin-type and pinless ones. The right one for you depends on the lumber you store and your needs.
| Moisture Meter Type | Description | Best For |
|---|---|---|
| Pin-Type | Uses pins to measure moisture content | Thicker lumber, hardwoods |
| Pinless | Uses electromagnetic signals to measure moisture content | Softwoods, veneer, and other thin materials |
By using dehumidifiers and moisture meters, you can make a great storage space for lumber. This helps keep the lumber quality high and prevents warping.
How to Store Lumber Properly: Step-by-Step Methods
Starting with good lumber storage is key to a tidy workshop. It makes your space safer and more efficient. You’ll find what you need faster and work better.
Using Stickers Between Boards
Stickers between boards are a must for lumber storage. They’re small pieces that keep boards apart and let air flow. This stops warping and keeps moisture away.
To use stickers right, put them often along the lumber. This helps it dry evenly and prevents it from getting bent out of shape.
Proper Spacing and Weight Distribution
Spacing and weight are crucial for storing lumber well. Boards need room to breathe to avoid moisture. Too tight and they can get damaged.
Stack lumber so it’s balanced. Heavier pieces go down, lighter ones up. This keeps the stack steady and safe.
| Storage Method | Benefits | Considerations |
|---|---|---|
| Using Stickers | Improves airflow, reduces warping | Requires regular placement |
| Proper Spacing | Enhances airflow, reduces moisture damage | May require more storage space |
| Weight Distribution | Increases stability, reduces accidents | Requires careful planning |
Wall-Mounted Rack Systems
Wall-mounted racks are great for small spaces. They use your wall space well and keep lumber tidy and within reach.
Make sure these racks are strong and easy to get to. They should be attached well to hold the lumber’s weight.
Freestanding Vertical Racks
Freestanding racks are another smart choice. They fit anywhere and are perfect for long lumber pieces.
Make sure these racks are stable and won’t fall. Use them with stickers and spacing for even better storage.
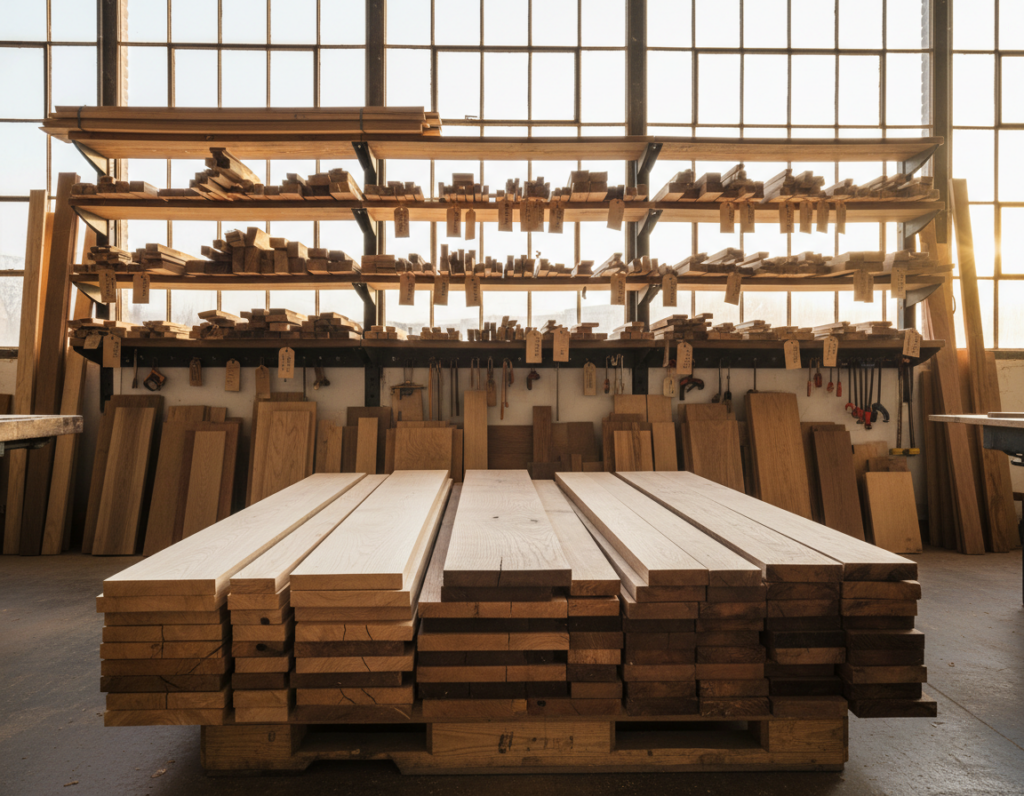
Follow these steps to make your lumber storage better. Your workshop will be safer, more organized, and more productive.
Building and Installing Storage Racks
Building a sturdy storage rack is key to keeping your workshop tidy. It also helps keep your lumber in top shape.
Materials and Tools Needed
To make a storage rack, you’ll need:
- 2×4 lumber for the frame
- 3/4 inch plywood for the shelves
- Screws and nails for assembly
- Drill and impact driver for drilling and driving screws
- Saw for cutting lumber to size
- Measuring tape and square for ensuring accurate measurements
| Material | Quantity | Purpose |
|---|---|---|
| 2×4 lumber | 8 pieces | Frame construction |
| 3/4 inch plywood | 2 sheets | Shelves |
| Screws | 1 box | Assembly |
| Nails | 1 bag | Assembly |
Step-by-Step Building Instructions
Here’s how to build your storage rack:
- Cut the 2×4 lumber into the required lengths for the frame.
- Assemble the frame using screws and nails.
- Cut the 3/4 inch plywood to size for the shelves.
- Attach the shelves to the frame, ensuring they are evenly spaced.
- Install the storage rack in your workshop, making sure it is level and secure.
By following these steps and using the right materials, you can create a storage rack that meets your lumber storage needs and adheres to best practices for storing lumber.
Organizing Lumber by Type, Size, and Project
To make your workshop better, you need a good way to store lumber. It should sort wood by type, size, and project. This keeps your workshop tidy and your wood in top shape.
Sorting lumber by type, size, and project has many perks. It makes finding what you need quicker. It also cuts down on waste and makes your workshop run smoother.
To set up a good system, start by grouping lumber by type. This includes hardwoods, softwoods, and engineered woods. Then, sort within these groups by size and project.
Utilizing Storage Solutions
Use labeled storage racks and bins. Think about vertical storage to save space and make things easy to reach.
Here’s a simple way to organize your lumber:
| Type | Size | Project |
|---|---|---|
| Oak | 1x4x8 | Bookshelf |
| Pine | 2x4x8 | Framing |
| Maple | 3/4″x4’x8′ | Cabinet |
Keep your storage system in check. Check for damaged wood, make sure everything is labeled, and update your list when you get new lumber or finish a project.
By following these steps and keeping your system up to date, your workshop will stay efficient. And your lumber will stay in great condition.
Preventing Lumber Damage and Deterioration
Keeping your workshop organized is more than just tidiness. It’s about stopping damage too. The right storage methods are key to keeping your lumber in top shape.
Proper support is crucial to avoid damage. Lumber without the right support can warp or bow. Make sure supports are evenly spaced and lumber isn’t hanging too far.
For long lumber, use more supports to spread the weight. This reduces warping risk. Also, store lumber flat, not at an angle, to prevent damage.
Acclimation Techniques for New Lumber
When you bring new lumber into your workshop, it needs to adjust to the environment. This prevents damage from sudden humidity and temperature changes. Store it in the workshop for a while before using it.
- Keep new lumber wrapped or covered to prevent it from drying out too quickly.
- Store new lumber in a well-ventilated area to help it acclimate more efficiently.
- Monitor the moisture content of the lumber and the workshop to ensure they are compatible.
Identifying Common Wood Pests
Wood pests can seriously harm your lumber. Knowing how to spot them is vital. Termites, carpenter ants, and beetles are common pests. Each needs a different way to treat and prevent.
| Pest | Signs of Infestation | Prevention Methods |
|---|---|---|
| Termites | Mud tubes, discarded wings | Eliminate moisture, use termite-resistant treatments |
| Carpenter Ants | Small holes in wood, sawdust | Seal entry points, reduce moisture |
| Beetles | Small holes in wood, beetle larvae | Properly season lumber, use beetle-resistant treatments |
Treatment and Prevention Methods
Stopping pests involves good storage and proactive steps. Regular checks and quick action can prevent big damage. Treatments like borate-based preservatives also help.
Keeping your workshop clean and dry lowers infestation risk. This simple step can make a big difference.
Common Lumber Storage Mistakes to Avoid
To keep your lumber in top shape, it’s key to know how to store it right. The right storage methods can greatly affect your woodworking projects’ quality. It’s important to steer clear of common mistakes that can harm your lumber.
One big mistake is not having enough air flow. Lumber needs air to prevent moisture buildup, which can cause warping, cracking, or rotting. It’s crucial to make sure there’s good air circulation around your lumber.
Another mistake is stacking lumber the wrong way. Lumber should be stacked so air can get to each piece. You can use stickers or spacers to help with this.
Not checking the moisture level is also a big error. Lumber that’s too wet or too dry can get damaged. Using a moisture meter can help you keep an eye on moisture levels.
Here’s a quick rundown of common lumber storage mistakes and their effects:
| Mistake | Consequence | Prevention |
|---|---|---|
| Inadequate ventilation | Moisture buildup, warping, cracking, or rotting | Ensure good airflow, use ventilation systems if necessary |
| Improper stacking | Damage to lumber, reduced quality | Use stickers or spacers between layers, stack lumber neatly |
| Failure to monitor moisture content | Damage due to excessive moisture or dryness | Use a moisture meter to track moisture levels |
By knowing and avoiding these common mistakes, you can keep your lumber in great shape. This ensures your woodworking projects will come out as planned. It’s vital for storing lumber correctly and using effective storage methods.
Conclusion
Storing lumber right is key to a tidy workshop and keeping your lumber safe. Knowing how to store lumber and checking your space helps. This way, your lumber stays dry, stable, and ready for your projects.
Storing lumber in a garage or a workshop can be done well. This article shows you how to use your space wisely and avoid damage. With the right storage racks and organization, your lumber will stay in top shape.
Follow these tips and avoid common mistakes to keep your workshop safe and efficient. This will make your projects easier to finish.