

Anúncios
Building a safe entrance to your yard is a rewarding task for any homeowner in the United States. A solid set of steps provides easy access and completes your outdoor living area.
This DIY deck stairs tutorial walks you through the construction process from start to finish. You can improve your property’s value by adding a functional and beautiful way to reach your garden.
Our featured manual simplifies the work for any skill level. You will discover how to calculate the rise and run for a perfect fit every time.
Anúncios
We also cover the best timber to use in this wooden guide to ensure your build stays strong. This walkthrough ensures that every board sits level and remains secure against the weather.
- Learn to calculate rise and run accurately for safety.
- Choose durable timber materials for your outdoor project.
- Master the assembly process using simple, clear steps.
Understanding local building codes is the first step in your journey toward a successful project. We focus on clear instructions to help you avoid common mistakes like improper spacing.
Get ready to transform your backyard with a sturdy new addition that your family will enjoy. Building something with your own hands brings a sense of pride that few other tasks can match.
Anúncios
Understanding Deck Stair Components and Planning
To construct a sturdy and aesthetically pleasing deck stair, it’s essential to familiarize yourself with its key components. Deck stairs are a critical part of your outdoor living space, providing safe access between different levels.
Stringers
Stringers are the longitudinal members that support the treads and risers of the staircase. They are typically made from pressure-treated lumber or naturally rot-resistant wood. The number of stringers required depends on the width of the staircase and the load it is expected to bear.
Treads
Treads are the horizontal surfaces that you step on when using the stairs. They should be made from durable, slip-resistant materials. The width of the treads is critical for safety and comfort; a minimum width of 10 inches is typically recommended.
Risers
Risers are the vertical elements between the treads. They help to enclose the staircase and can add to its aesthetic appeal. The height of the risers should be consistent throughout the staircase to ensure safety and compliance with building codes.
Railings and Posts
Railings and posts are crucial for safety, providing support and preventing falls from the staircase. Railings should be sturdy and comply with local building codes regarding height and design.
Understanding these components is vital for planning and executing your deck stair project effectively. Here’s a summary of the key components and their functions:
| Component | Function | Considerations |
|---|---|---|
| Stringers | Support treads and risers | Material, number required |
| Treads | Provide stepping surface | Width, material, slip resistance |
| Risers | Enclose the staircase | Height consistency, material |
| Railings and Posts | Provide safety and support | Height, design, compliance with building codes |
By understanding the roles of these components, you can design and build a wooden staircase that is both functional and visually appealing, enhancing your outdoor living space.
Building Code Requirements for Deck Stairs
When constructing deck stairs, it’s crucial to adhere to local building code requirements to ensure safety and compliance. These regulations vary by jurisdiction, so it’s essential to familiarize yourself with the specific codes in your area.
Maximum Riser Height
The maximum riser height is a critical factor in deck stair safety. Building codes typically specify a maximum riser height to prevent steep stairs that can be hazardous.
- Most jurisdictions require a maximum riser height of 7.75 inches or less.
- Uniform riser heights are also crucial to prevent tripping hazards.
Minimum Tread Depth
Tread depth is another vital aspect of deck stair construction. A sufficient tread depth ensures that each step provides enough room for comfortable footing.
- Building codes often mandate a minimum tread depth of 10 inches.
- A deeper tread can enhance safety, especially for older adults or young children.
Stair Width Requirements
The width of deck stairs is also subject to building code regulations. A wider stairway can be safer and more accessible.
- Many building codes require deck stairs to be at least 36 inches wide.
- A wider stairway may be necessary for larger decks or for stairs that will be used frequently.
Compliance with these building code requirements is not only legally necessary but also crucial for ensuring the safety of those using the deck stairs. It’s advisable to consult local building authorities or a professional contractor to ensure that your deck stairs meet all relevant codes and regulations.
Selecting Materials for Outdoor Stair Construction
The selection of materials for outdoor stair construction significantly impacts the overall longevity and look of your deck stairs. When choosing materials, it’s essential to consider durability, maintenance requirements, and aesthetic appeal.
Different types of wood offer varying levels of resistance to rot, decay, and insect damage. The right choice depends on your budget, the climate in your area, and the desired appearance of your deck stairs.
Pressure-Treated Southern Yellow Pine
Pressure-treated Southern Yellow Pine is a popular choice for outdoor stair construction due to its affordability and durability. The pressure-treatment process involves infusing the wood with preservatives that resist rot and insect damage.
This type of wood is particularly suitable for areas with high moisture levels. However, it may require periodic inspections to ensure the treatment remains effective.
Cedar and Redwood
Cedar and Redwood are naturally resistant to rot and insects, making them excellent choices for outdoor stair construction. Both types of wood contain oils that repel moisture and pests.
Cedar is known for its distinctive aroma and attractive appearance, while Redwood offers a rich, reddish-brown color. Both options are more expensive than pressure-treated lumber but provide a natural, beautiful look.
Tropical Hardwoods
Tropical hardwoods, such as Ipe and Mahogany, are renowned for their exceptional durability and resistance to environmental stresses. These woods are denser than many other types, making them highly resistant to wear and tear.
While they are among the more expensive options, tropical hardwoods offer a long lifespan and require less maintenance over time. Their rich colors and fine grain also add to their aesthetic appeal.
When selecting materials for your deck stairs, consider not only the initial cost but also the long-term benefits and maintenance requirements. The right material will enhance the overall wooden staircase design and ensure your outdoor stairs remain safe and attractive for years to come.
Tools Required for This DIY Deck Stairs Tutorial
Before diving into the DIY deck stairs tutorial, it’s crucial to gather the necessary tools for a successful wooden steps installation. Having the right tools at your disposal will make the process smoother and more efficient.
The following tools are essential for building wooden stairs for your deck:
Tape Measure and Speed Square
A tape measure is vital for taking accurate measurements of the area where the stairs will be installed. A speed square is used to ensure that the cuts made on the stringers are precise and square.
Carpenter’s Level
A carpenter’s level is necessary to ensure that the stairs are properly aligned and level. This tool will help prevent any issues with the structural integrity of the stairs.
Framing Square
A framing square is used to check the squareness of the stair components and to lay out the stringers. It’s an indispensable tool for ensuring that the stairs are built to last.
In addition to these specific tools, having a general toolkit with essentials like a circular saw, drill, and hammer will be necessary for completing the project.
By having all the necessary tools ready, you’ll be well-prepared to tackle the DIY deck stairs tutorial and achieve a successful wooden steps installation.
Calculating and Measuring Your Stair Dimensions
Measuring and calculating the dimensions of your stair components is vital for a successful wooden steps installation. Accurate measurements ensure that your deck stairs are not only safe and compliant with building codes but also aesthetically pleasing and functional.
The first step in calculating your stair dimensions is to determine the total rise and total run of your stairs. The total rise is the vertical distance from the deck surface to the ground, while the total run is the horizontal distance that the stairs will cover.
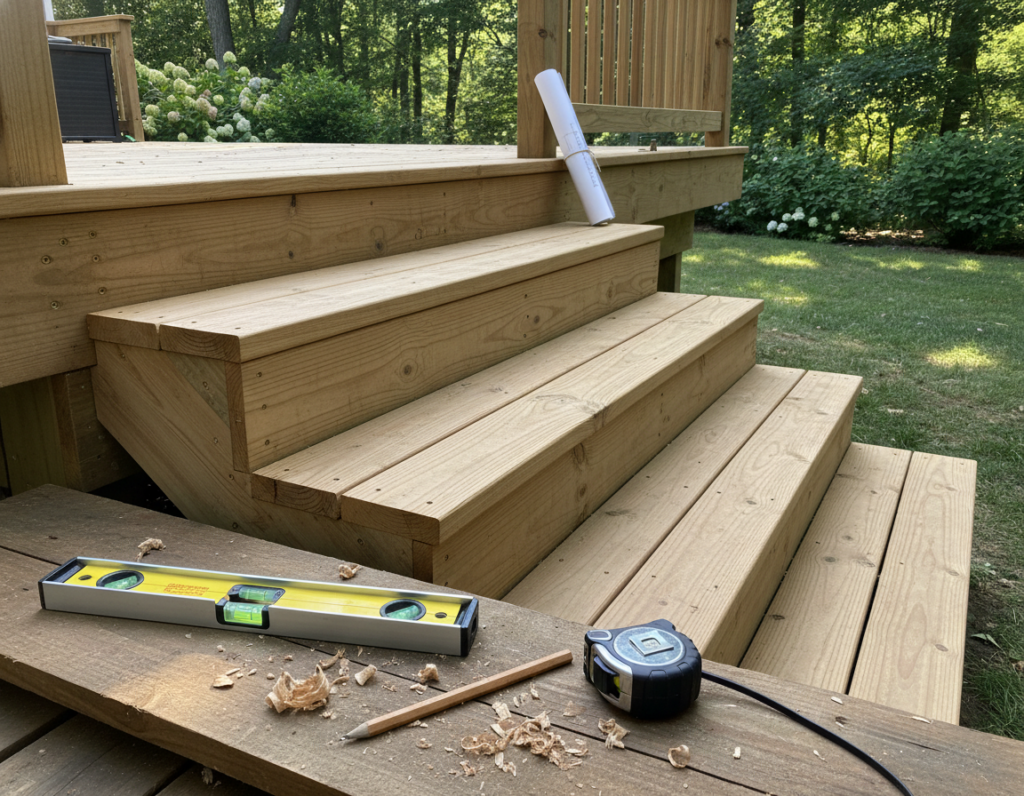
To calculate the number of steps you’ll need, divide the total rise by the maximum riser height allowed by your local building code. Typically, this is around 7.75 inches. For example, if your total rise is 42 inches, you would need 5-6 steps (42 / 7.75 = 5.42).
Here are key dimensions to calculate for your wooden deck stairs:
- Total Rise: Vertical distance from the deck to the ground.
- Total Run: Horizontal distance covered by the stairs.
- Number of Steps: Determined by dividing the total rise by the riser height.
- Stringer Length: Calculated using the total rise and total run.
Practical tips for measuring and ensuring accuracy include:
- Double-check your measurements to avoid errors.
- Use a level to ensure that your measurements are taken on a level surface.
- Consider the thickness of the treads and risers when calculating your total rise and run.
By following these steps and tips, you can ensure that your wooden deck stairs are built to last, are safe, and comply with local building codes, making your wooden steps installation a success.
Preparing Footings and the Landing Area
The foundation of safe and durable deck stairs lies in the proper preparation of footings and the landing area. This step is critical in outdoor stair construction as it ensures the stability and safety of the entire structure.
To begin, you need to identify the location where your deck stairs will meet the ground. This area is known as the landing area. It’s crucial that this area is level and compact. If the ground is soft or uneven, you may need to make adjustments to create a stable base.
Preparing the footings involves digging holes for the stair stringers or the landing. The depth of these holes depends on your local building codes, which often specify a minimum depth to prevent frost heave and ensure stability.
- Mark out the area where the footings will be dug.
- Dig the holes to the required depth, typically below the frost line.
- Fill the holes with compacted gravel or concrete to create a solid base.
For the landing area, ensure it’s level and securely attached to the deck. If you’re building on uneven terrain, consider using adjustable footings or making adjustments to the ground to achieve a level surface.
By carefully preparing the footings and landing area, you lay the groundwork for a safe and durable outdoor stair construction project.
Wooden Steps Installation: Cutting and Mounting Stringers
In this section, we’ll delve into the process of cutting and mounting stringers for your deck stairs, a critical component of the wooden steps installation.
Setting Up Your Framing Square
To begin, you’ll need to set up your framing square to ensure accurate measurements. A framing square is a versatile tool that helps you mark precise angles and measurements on your stringers.
- Place the framing square on the stringer material, aligning it with the edge.
- Mark the location of the riser and tread on the stringer using a pencil.
- Double-check your measurements to avoid errors.
Marking Riser and Tread Cuts
Accurate marking of riser and tread cuts is essential for a sturdy and safe staircase.
Using your framing square, mark the cuts on the stringer according to your calculations from the previous section.
- Ensure the marks are clear and precise.
- Use a level to verify that your marks are straight and level.
Cutting with a Circular Saw
With your stringer marked, it’s time to make the cuts using a circular saw.
Set the depth of your circular saw to match the thickness of your stringer material.
- Carefully cut along the marked lines.
- Use a steady hand and maintain control of the saw.
After cutting with a circular saw, you may need to finish the corners with a handsaw.
This step ensures that your cuts are precise and clean.
- Use a handsaw to carefully remove any remaining material.
- Smooth out the corners for a professional finish.
Using a Ledger Board
A ledger board provides additional support to your stringers.
Attach the ledger board to the deck frame according to your local building codes.
- Ensure the ledger board is level and securely fastened.
- Use the appropriate fasteners for your ledger board.
Securing with Structural Screws or Bolts
Finally, secure your stringers to the ledger board and the deck frame using structural screws or bolts.
This step is critical for the stability and safety of your deck stairs.
- Tighten the screws or bolts firmly.
- Double-check that all connections are secure.
By following these steps, you’ll successfully cut and mount your stringers, a crucial part of your DIY deck stairs tutorial.
Installing Stair Treads and Risers
Once the stringers are securely in place, it’s time to install the stair treads and risers. This step is critical for creating a sturdy and attractive staircase that complements your deck’s design.
To begin, ensure that your treads and risers are cut to the correct dimensions. The treads should be wide enough to provide comfortable footing, and the risers should be tall enough to create a visually appealing and safe staircase.
Screw Placement and Spacing
Proper screw placement is essential for securing the treads and risers to the stringers. Screws should be placed at an angle to maximize holding power and minimize the risk of splitting the wood.
The spacing between screws is also crucial. A general rule of thumb is to space screws about 1 inch from the edges of the tread or riser and about 2-3 inches apart along the length.
| Screw Type | Spacing | Edge Distance |
|---|---|---|
| 2.5″ Deck Screws | 2-3 inches | 1 inch |
| 3″ Deck Screws | 2-3 inches | 1 inch |
Preventing Wood Splitting
To prevent wood splitting, it’s advisable to pre-drill screw holes, especially near the ends of the treads and risers. Using a drill bit that is slightly smaller than the screw will help guide the screw into place without causing the wood to split.
Additionally, using screws with a bugle head or countersink can help reduce the risk of splitting by allowing the screw head to sit flush with or below the surface of the wood.
Complete Wooden Deck Stairs Guide: Adding Railings
Railings are not just a safety necessity but also an opportunity to add style to your deck stairs. The right railing can enhance the overall look of your deck while providing the necessary safety features.
Traditional Wood Railings
Traditional wood railings are a classic choice that can complement the natural look of your wooden deck stairs. They can be stained or painted to match the deck’s color scheme.
- Durability: With proper maintenance, wood railings can last for many years.
- Aesthetic Versatility: Wood can be easily customized to fit various design styles.
Cable Rail Systems
Cable rail systems offer a modern and sleek alternative to traditional railings. They provide an unobstructed view and can be a great choice for decks with a scenic backdrop.
- Modern Aesthetic: Cable railings give a contemporary look to your deck.
- Minimal Maintenance: They require less maintenance compared to traditional wood railings.
Composite and Metal Options
Composite and metal railings are durable and low-maintenance options. Composite railings mimic the look of wood but are more resistant to weathering, while metal railings offer a sturdy and modern appearance.
- Durability: Both composite and metal railings are highly durable and can withstand harsh weather conditions.
- Low Maintenance: They require less upkeep than traditional wood railings.
| Railing Type | Durability | Maintenance | Aesthetic Appeal |
|---|---|---|---|
| Traditional Wood | High with maintenance | Regular staining/painting | Classic, customizable |
| Cable Rail Systems | High | Low | Modern, sleek |
| Composite/Metal | High | Low | Durable, modern |
The choice of railing depends on your personal preference, budget, and the overall design of your deck. By considering these factors, you can select a railing system that not only ensures safety but also enhances the beauty of your deck stairs.
How to Finish Wooden Stairs and Deck Stair Maintenance Tips
To keep your wooden deck stairs in top condition, it’s essential to apply a finish that protects the wood and maintains its appearance. Finishing your wooden stairs not only enhances their aesthetic appeal but also plays a crucial role in protecting them from the elements.
Semi-Transparent vs Solid Stains
Semi-transparent stains allow the natural grain of the wood to show through while providing color and protection. Solid stains, on the other hand, provide a more opaque finish, hiding the wood grain but offering greater protection against the elements.
| Stain Type | Appearance | Protection Level | Durability |
|---|---|---|---|
| Semi-Transparent | Shows wood grain | Moderate | Good |
| Solid | Hides wood grain | High | Excellent |
Best Exterior Wood Sealers
Choosing the right sealer is crucial for protecting your wooden deck stairs. Look for sealers that are specifically designed for exterior use and offer UV protection.
- Water-based sealers
- Oil-based sealers
- Hybrid sealers
Checking for Loose Fasteners
Regular maintenance involves checking for loose fasteners. Over time, the wood can shrink or expand, causing screws or nails to become loose.
Inspecting for Rot or Damage
Inspect your deck stairs regularly for signs of rot or damage. Look for soft spots, discoloration, or fungal growth.
Reapplying Finish Every 2-3 Years
To maintain the protective barrier and appearance of your deck stairs, reapply a finish every 2-3 years, depending on the type of finish and exposure to the elements.
Conclusion
Creating a wooden deck stairs guide that is both informative and easy to follow is crucial for homeowners looking to enhance their outdoor living spaces. By following the steps outlined in this comprehensive guide, individuals can ensure their deck stairs are not only aesthetically pleasing but also safe and durable.
Careful planning, precise construction, and regular maintenance are essential for achieving professional-looking results. From understanding deck stair components and building code requirements to selecting the right materials and tools, each step plays a vital role in the overall quality of the finished project.
A well-constructed wooden deck stairs guide should emphasize the importance of proper footings, accurate measurements, and secure installations. By doing so, homeowners can enjoy their outdoor spaces with confidence, knowing their deck stairs are built to last.
Regular maintenance is also crucial for extending the lifespan of wooden deck stairs. By inspecting the stairs regularly and addressing any issues promptly, homeowners can prevent costly repairs and ensure their deck remains a beautiful and functional part of their home.